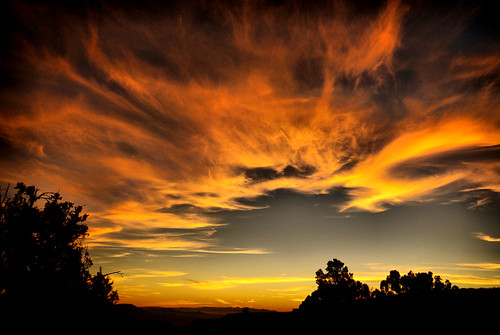
Nature photography refers to a wide range of photography taken outdoors and devoted to displaying natural elements such as landscapes, wildlife, plants, and close-ups of natural scenes and textures. Nature photography tends to put a stronger emphasis on the aesthetic value of the photo than other photography genres, such as photojournalism and documentary photography.
Nature photographs are published in scientific, travel and cultural magazines such as National Geographic Magazine, National Wildlife Magazine and Audubon Magazine or other more specific magazines such as Outdoor Photographer and Nature's Best Photography. Well known nature photographers include Frans Lanting, Galen Rowell, Eliot Porter and Art Wolfe.
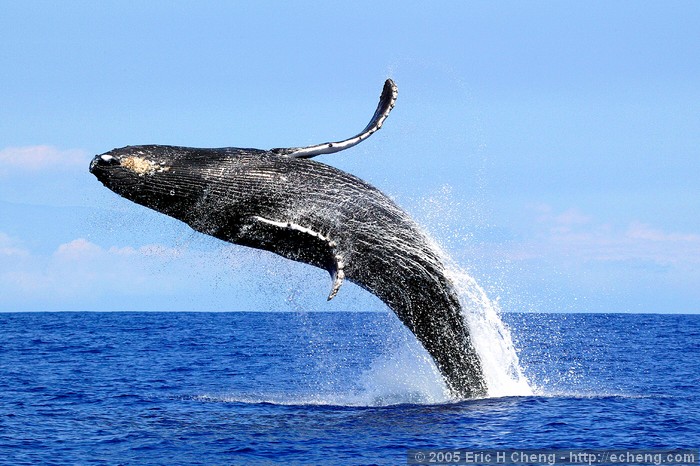
Wildlife photography is devoted to capturing interesting animals in action, such as eating, fighting, or in flight. Although usually shot in the wild, game farms are also a frequent location for wildlife photography.
The techniques of wildlife photography differ greatly from those used in landscape photography. For example, in wildlife photography wide apertures are used to achieve a fast shutter speed, freeze the subject's motion, and blur the backgrounds, while landscape photographers prefer small apertures. Wildlife is also usually shot with long telephoto lenses from a great distance; the use of such telephoto lenses frequently necessitates the use of a tripod (since the longer the lens, the harder it is to handhold). Many wildlife photographers use blinds or camouflage.
Macro / Texture
The macro photography article explains close-up photography in general; however, this is also a type of nature photography. While common macro subjects - bees, dragonflies, and so on - could be described as wildlife, their world also makes for good photography.
Many photographers record images of the texture in a stone, tree bark, leaf, or any of other small scenes. Many of these images are abstract. Tiny plants and mushrooms are also popular subjects. Close-up nature photography doesn't always need a true macro lens; however, the scenes here are small enough that they're generally considered different from regular landscapes.
Use of color
Color images are not a requirement of nature photography. Ansel Adams is famous for his black and white depictions of nature, while Galen Rowell praised Fujifilm Velvia film for its bright, saturated colors, asking "Who wants to take dull pictures that will last a hundred years?" Both men distinguish between photography as an expressive art form and sensitometry; an accurate reproduction is not necessary.
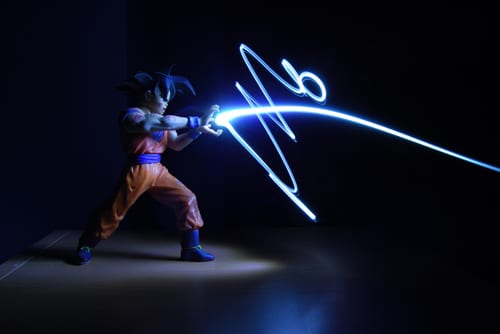
Several months ago Richard wrote a Photoshop tutorial on How to Create Light Effects. I’m not a Photoshop master like Richard, and every time I look at that article, I think about creating light effects (called light painting) with my camera.
The tutorials on this site will help you turn your 'snaps' into pictures that will delight your viewers rather than bore them to death.
Click here to find free tutorials to read online, covering all aspects of photography. There are articles on all aspects of photography and photo editing, which I have collated into eight different sections;
Equipment
The Basics
Composition
Exposure
Lighting
Color
Working with Different Subjects
Using Photoshop
If you are new to photography and are not sure where to start, I recommend you begin at the beginning.
There are a growing number of video tutorials on various aspects of photo editing for you to watch. They are suitable for both beginners and more advanced photographers.
If you are not a big reader or just want a 'quick fix' solution to a problem, try the Top Ten Photography Tips page first.
Learn Digital Photography with Geoff Lawrence
I have recently compiled my first eBook, Learn Digital Photography with Geoff Lawrence which is available for download in PDF format, so you can read at your leisure on your computer or tablet.
If you get bored with just reading, try your luck in the Photo Quiz. It's just a bit of fun but you might learn something too.
Don't miss the members' gallery where you can see many photos taken by photographers from all around the world. It is developing into a friendly community where you can give and receive advice to help improve your photography. Don't be shy, upload some photos.
If you have any questions on photography related matters, visit the community forum where, after registering, you can ask anything you want.
An Introduction to Studio Lighting
Once you develop a taste for indoor photography it is only a matter of time before you will want your own studio setup. A studio setup can be anything from a few table lamps and a spare sheet for the background to an elaborate multi flash system.
Although continuous light can be used, I would thoroughly recommend that, if you want to get serious about studio photography, you invest in a couple of studio flash heads. These do not need to be expensive, nowadays you can get a couple of lights for about the same price as a halfway decent telephoto lens.
Studio flash heads have several advantages for the photographer because they are powerful,
even the lower priced units kick out much more power that the average
portable flash, and infinitely more than continuous light. This means
that you can control the light in interesting ways by using umbrellas
and soft boxes to diffuse the light and soften the shadows, whilst still
getting a reasonable exposure at a small aperture. Flash can freeze the
action (as you can see from the picture on the left), with
very fast exposure times, and give you all the depth of field you need.
All the head shots below were exposed at 1/100sec at f32 with the ISO
set at 200. Although your portrait sitter will not move as fast as my
Martini, hopefully, the pictures will be a lot sharper using flash than
they will using continuous light. Studio flash heads also recycle very
fast, much faster than a portable flashgun, so you can keep shooting at a
fast rate, which is important when you are doing portraits.
You don't need to go for any top of the range
lights unless you are going to take up studio photography for a career.
The top professional gear will be bigger, more powerful and more
reliable when used all day everyday, but in my experience the bottom of
the range lights are certainly powerful enough for use with our DSLR
cameras, and as for reliability, I have had the same lights for ten
years now and would expect at least another ten years' service out of
them. I have never had any reliability problems with studio flash, which
is a lot more than I can say for the portable battery flashguns that I
have used over the years.
Digital photography is a form of photography that uses an array of electronic photodetectors to capture the image focused by the lens, as opposed to an exposure on photographic film. The captured image is then stored as a computer file ready for digital processing, viewing, digital publishing or printing.
Until the advent of such technology, photographs were made by exposing light sensitive photographic film, and used chemical photographic processing to develop and stabilize the image. By contrast, digital photographs can be displayed, printed, stored, manipulated, transmitted, and archived using digital and computer techniques, without chemical processing.
Digital photography is one of several forms of digital imaging. Digital images are also created by non-photographic equipment such as computer tomography scanners and radio telescopes. Digital images can also be made by scanning conventional photographic images.
Digital photography has many advantages over traditional film photography. Digital photos are convenient, allow you to see the results instantly, don't require the costs of film and developing, and are suitable for software editing and uploading to the Internet.
While shooting on film will always have a place in the world of photography, digital models have taken over the consumer camera market almost completely. Just five years ago, buying a digital camera that could take photos of the same visual quality as a film camera could cost more than $1,000. But prices have dropped tremendously, and camera quality has increased. Today cameras in the $500 range are near-professional quality, and all but the cheapest digital cameras produce decent looking images.
Learn More
Digital Cameras
Digital Camera Quiz
TreeHugger.com: Digital Picture Frames
There are also many additional features available on digital cameras, including image stabilization, on-board image editing, color correction functions, auto-bracketing and burst modes. A lot of these can be handled by image editing software, and so they can be unnecessary (and often inferior) when built into a camera. Burst mode, macro mode and image stabilization are probably the most useful extra features, but the best way to find out which camera is best for you is to explore any of the numerous digital photography magazines and Web sites that offer comparisons and user reviews of hundreds of different cameras.
If you own or are planning to buy a digital camera, this article will take you beyond point-and-shoot and help you get more out of it. See the next page to get started.
Many camera phones and most digital cameras use memory cards having flash memory to store image data. The majority of cards for separate cameras are SD format; many are CompactFlash and the other formats are rare. XQD card format is the latest form of storage medium. Modern digital cameras internal memory for a limited capacity for pictures that can be transferred to or from the card or through the camera's
connections; even without a memory card inserted into the camera.
Memory cards allow for vast numbers of photos to be taken, requiring attention only when the memory card has exhausted its free space. For most users this translates into dozens to hundreds of quality photos to be stored on the same memory card. Transferring the images is also possible for archival or personal use to another medium as required by the photographer.
We present an approach to convert a small portion of a light field with
extracted depth information into a cinematic effect with simulated,
smooth camera motion that exhibits a sense of 3D parallax. We develop a
taxonomy of the cinematic conventions of these effects, distilled from
observations of documentary film footage and organized by the number of
subjects of interest in the scene. We present an automatic,
content-aware approach to apply these cinematic conventions to an input
light field. A face detector identifies subjects of interest. We then
optimize for a camera path that conforms to a cinematic convention,
maximizes apparent parallax, and avoids missing information in the
input. We describe a GPU-accelerated, temporally coherent rendering
algorithm that allows users to create more complex camera moves
interactively, while experimenting with effects such as focal length,
depth of field, and selective, depth-based desaturation or brightening.
We evaluate and demonstrate our approach on a wide variety of scenes and
present a user study that compares our 3D cinematic effects to their 2D
counterparts.
How to take 3D photos
A couple of weeks ago, I wrote a tutorial on how to see cross-eye 3D stereo photos on your computer screen. Today I’m going to tell you how to take your own 3D photos.
The process is really very simple, and the basics can be explained in
less than a minute, but to become good at taking and presenting 3D
photos take a bit more time, and it’s something that really develops
with practice. I hope you’ll take what you learn here and get out and
get lots of practice taking 3D photos. The typical and easiest single-camera 3D photography technique is
commonly called the “cha-cha” technique, for reasons which will soon
become obvious. Here’s the technique in a nutshell: Taking the Photos
Always take photos in portrait orientation
Set the camera to full manual and choose the correct exposure and focus
Put your feet square on to the subject of your 3d photo
Put your weight onto your right foot, without lifting your left
Take the first photo
Put your weight onto your left foot without raising your right
Unless your subject is very close, you don’t need to turn your camera to keep it in the centre
Take the second photo
And you’re done! As simple as that. Simply by shifting your weight
from one foot to the other, you move your viewpoint by several
centimetres, sufficient to get a 3D effect. The “cha-cha” name refers to
the side to side sway you do when taking the photo.
proccesing
Now you’ve got two photos, but you need to make one. I use a fantastic
piece of free software called StereoPhoto Maker. It’s not the prettiest
software, but it does a fantastic job. It can be used in conjunction
with a plugin called AutoPano, that can analise the two images and
automatically correct for many of the problems that can come from
shooting two separate images. This includes tilting and twisting, moving
forward or back between shots, and the “keystone distortion” that
occurs when you turn the camera to centre the subject for close 3D
photos.
Step by step
Drag both photos onto the StereoPhoto Maker shortcut icon
Zoom out a bit with your mouse’s scroll wheel if you need to to make
it easier to fuse the pair into 3D with the cross-eye technique
If the 3D effect seems reversed, click the swap button to swap the images correctly for a crossed eye view
Click on the auto align button to use autopano to correct for any distortions
Click on the Easy Adjustment button to fix the 3D images position relative to the 3D window (see below for more information)
I find adding a border helps, so if you like, in the menu go to View – Border Options
Check “Show Border” and adjust the border settings to your liking
Save the image by clicking in the menu File – Save Stereo Image
Enjoy your new 3d photo!
The 3D “Window”
The edge of the image is more than just the boundaries of the 3D
photograph. In a 3D photo, it is also a “hole” into which you look and
through which 3D subjects can appear. A good way to think of the edge of
the image is as a literal window in your computer screen. This is one
of the reasons why I find a border around both parts of the 3D image
helps me, it more clearly defines the edge of the 3D window.
Just like a real window, you expect to look through it, and rarely do
you expect things seen beyond it to come back through it at you. One
nasty optical illusion that can happen with 3D photos is when part of
the 3D subject “touches” the window, or worse, appears to overlap it.
Have a look at the two examples below:
The subject is placed too far forward in the 3D window, and appears to
overlap the window’s edge, creating an uncomfortable optical illusion.
This is most obvious on the left of this stereo photoHow to View
Here the photo has been corrected, pushing the 3D subject back in 3D space beyond the window frame.
How to View
Now that you’ve got a whole bunch of awesome 3D photos, it’s time to
share them around.
If you’d like to share your new 3D masterpieces, and I encourage you to do so, there’s a Stereophotography Flickr group, and one on Yahoo
too. I’d love you to put links to your 3D photos in the comments to
this post, so I can see how you’ve done! I’m relatively new to 3D
photography, so I’m sure there’s much you can teach me too!
Advantages
You don’t need expensive specialist 3D equipment
Each eye’s image is captured on a full frame, so the resulting 3D image can be very high resolution
There is no blurring or ghosting at the edge of the frame, which can
be seen in many “beam splitter” attachments where the two views join
You can take a 3D photo with any lens in your SLR kit, including macro, for extremely close 3D photos
Many 3D attachments have very limited control over focus and
aperture, with the cha-cha technique you have complete control over the
settings
You can do this with any camera, if you forget to take your 3D attachment or camera, you can still take 3D photos this way
Disadvantages
The most obvious and critical shortcoming is that this method only works with still object that don’t move between shots
Any movement between the two shots will cause a distracting 3D
error, so people, animals and even trees in a light breeze will be
difficult or impossible to shoot
You need to take two photos for every 3D image, which takes twice as long, and uses twice as much space
It is easy to introduce errors such as twisting or tilting the camera between shots which can cause distracting artifacts
You need to shoot with manual settings so that there’s no accidental variation in exposure or focus
Photography is the art, science and practice of creating durable images by recording light or other electromagnetic radiation, either chemically by means of a light-sensitive material such as photographic film, or electronically by means of an image sensor.Typically, a lens is used to focus the light reflected or emitted from objects into a real image on the light-sensitive surface inside a camera during a timed exposure. The result in an electronic image sensor is an electrical charge at each pixel, which is electronically processed and stored in a digital image file for subsequent display or processing.
The result in a photographic emulsion is an invisible latent image, which is later chemically developed into a visible image, either negative or positive depending on the purpose of the photographic material and the method of processing. A negative image on film is traditionally used to photographically create a positive image on a paper base, known as a print, either by using an enlarger or by contact printing.
Photography has many uses for business, science, manufacturing (e.g. photolithography), art, and recreational purposes.
Diaphragm (optics)
In optics, a diaphragm is a thin opaque structure with an opening (aperture) at its center. The role of the diaphragm is to stop the passage of light, except for the light passing through the aperture. Thus it is also called a stop (an aperture stop, if it limits the brightness of light reaching the focal plane, or a field stop or flare stop for other uses of diaphragms in lenses). The diaphragm is placed in the light path of a lens or objective, and the size of the aperture regulates the amount of light that passes through the lens. The centre of the diaphragm's aperture coincides with the optical axis of the lens system.
Most modern cameras use a type of adjustable diaphragm known as an iris diaphragm, and often referred to simply as an iris.
See the articles on aperture and f-number for the photographic effect and system of quantification of varying the opening in the diaphragm.
THERE IS ONE GOOD QUESTION
"Only the print contains the artist's meaning and message."
Examples_-_The_Making_of_40_Photographs, _1983 "> Ansel Adams, Introduction to Examples - The Making of 40 Photographs, 1983
The term comes from the Greek word phos, photos - light and graphos - writing. The word photography means writing with light but most photographers claim they are painting with light!
As far as can be ascertained, it was Sir John Herschel in a lecture before the Royal Society of London, on March 14, 1839 who made the word "photography" known to the world. But in an article published on February 25 of the same year in a German newspaper called the Vossische Zeitung, Johann von Maedler, a Berlin astronomer, had used the word photography already.The word photography derives from the Greek(PHOTOS), genitive of (PHOS), "light" and (GRAPHE) "representation by means of lines" or "drawing", together meaning "drawing with light".
Photographic film is a sheet of plastic (polyester, PET, nitrocellulose or cellulose acetate) coated with an emulsion containing light-sensitive silver halide salts (bonded by gelatin) with variable crystal sizes that determine the sensitivity, contrast and resolution of the film. When the emulsion is sufficiently exposed to light (or other forms of electromagnetic radiation such as X-rays), it forms a latent (invisible) image. Chemical processes can then be applied to the film to create a visible image, in a process called film developing. In black-and-white photographic film there is usually one layer of silver salts. When the exposed grains are developed, the silver salts are converted to metallic silver, which blocks light and appears as the black part of the film negative. Color film uses at least three layers. Dyes, which adsorb to the surface of the silver salts, make the crystals sensitive to different colors. Typically the blue-sensitive layer is on top, followed by the green and red layers. During development, the exposed silver salts are converted to metallic silver, just as with black-and-white film. But in a color film, the by-products of the development reaction simultaneously combine with chemicals known as color couplers that are included either in the film itself or in the developer solution to form colored dyes. Because the by-products are created in direct proportion to the amount of exposure and development, the dye clouds formed are also in proportion to the exposure and development. Following development, the silver is converted back to silver salts in the bleach step. It is removed from the film in the fix step. This leaves behind only the formed color dyes, which combine to make up the colored visible image. Newer color films, like Kodacolor II, have as many as 12 emulsion layers,[citation needed] with upwards of 20 different chemicals in each layer. Due to film photography's long history of widespread use, there are now around one trillion pictures on photographic film or photographic paper in the world, enough to cover an area of around ten thousand square kilometres (4000 square miles), about half the size of Wales.
Film speed
Hurter and Driffield began pioneering work on the light sensitivity of photographic emulsions in 1876. Their work enabled the first quantitative measure of film speed to be devised.
Film speed describes a film's threshold sensitivity to light. The international standard for rating film speed is the ISO scale which combines both the ASA speed and the DIN speed in the format ASA/DIN. Using ISO convention film with an ASA speed of 400 would be labeled 400/27°. A fourth naming standard is GOST, developed by the Russian standards authority. See the film speed article for a table of conversions between ASA, DIN, and GOST film speeds.
History of film
Early photography in the form of daguerreotypes did not use film at all. The light-sensitive chemicals were formed on the surface of a silver-plated copper sheet. Beginning in the 1850s, thin glass plates coated with photographic emulsion became the standard medium. Although fragile and heavy, the glass used for photographic plates was of better optical quality than early transparent plastics, and in early years it was also less expensive, so the use of such plates persisted long after the introduction of film. Eastman Kodak marketed the first flexible photographic roll film in 1885, but this original "film" was actually coated on paper.
Spectral sensitivity
Early photographic plates and films were usefully sensitive only to blue, violet and ultraviolet light. In 1873, Hermann Wilhelm Vogel discovered that the spectral sensitivity could be extended by adding very small quantities of certain dyes to the emulsion. The instability of early sensitizing dyes and their tendency to rapidly cause fogging initially confined their use to the laboratory, but in 1883 the first commercially dye-sensitized plates appeared on the market.
Color
Experiments with color photography began almost as early as photography itself, but the three-color principle underlying all practical processes was not set forth until 1855, not demonstrated until 1861, and not generally accepted as "real" color photography until it had become an undeniable commercial reality in the early 20th century. Although color photographs of good quality were being made by the 1890s, they required special equipment, long exposures, complex printing or display procedures and highly specialized skills, so they were then exceedingly rare. The first easily used and commercially successful color "film" was the Lumière Autochrome, a glass plate product introduced in 1907.
Effect on lens and equipment design
Photographic lenses and equipment are designed around the film to be used. Although the earliest photographic materials were sensitive only to the blue-violet end of the spectrum, partially color-corrected achromatic lenses were normally used, so that when the photographer brought the visually brightest yellow rays to a sharp focus, the visually dimmest but photographically most active violet rays would be correctly focused, too. The introduction of orthochromatic emulsions required the whole range of colors from yellow to blue to be brought to an adequate focus. Most plates and films described as orthochromatic or isochromatic were practically insensitive to red, so the correct focus of red light was unimportant; a red window could be used to view the frame numbers on the paper backing of roll film, as any red light which leaked around the backing would not fog the film; and red lighting could be used in darkrooms.
Special films
Instant photography, as popularised by Polaroid, uses a special type of camera and film that automates and integrates development, without the need of further equipment or chemicals. This process is carried out immediately after exposure, as opposed to regular film, which is developed afterwards and requires additional chemicals. See instant film.
Films can be made to record non-visible ultraviolet (UV) and infrared (IR) radiation. These films generally require special equipment; for example, most photographic lenses are made of glass and will therefore filter out most ultraviolet light. Instead, expensive lenses made of quartz must be used. Infrared films may be shot in standard cameras using an infrared band- or long-pass filter, although the infrared focal point must be compensated for.
Exposure and focusing are difficult when using UV or IR film with a camera and lens designed for visible light. The ISO standard for film speed only applies to visible light, so visual-spectrum light meters are nearly useless. Film manufacturers can supply suggested equivalent film speeds under different conditions, and recommend heavy bracketing (e.g. with a certain filter, assume ISO 25 under daylight and ISO 64 under tungsten lighting). This allows a light meter to be used to estimate an exposure. The focal point for IR is slightly farther away from the camera than visible light, and UV slightly closer; this must be compensated for when focusing. Apochromatic lenses are sometimes recommended due to their improved focusing across the spectrum.