Indoor photography can be among the most challenging subjects for amateur and professional photographers.
Lack of windows, natural light and the terrible effects of artificial lighting can all create unappealing or even undistinguishable images.
I decided to post this photo in the
Lighting On Location section
because location doesn’t just mean outdoors. Many times I like to use
the available light that is in the room. In this instance it was a
bathroom. Now this is something I learned from
Helmut Newton.
When he first started shooting he couldn’t afford professional
lighting. He was very poor. So he used the lamps in his house as his
lighting source. Of course back then he used film and did all his color
correcting in the darkroom or used the correct film for such lighting
conditions. But I have come to like the warm color cast that results
from NOT white balancing my camera. This is the original shot.
Composition is Everything. Because indoor photography
consists of so many architectural lines, keeping good composition is of
the utmost importance. Really pay attention to how you frame images,
especially in places that have exposed brick or tile work. Maintaining a
nice, constant flow through the images is essential and even slightly
off balanced it will be noticed.
Pay Attention to the Small Details. It doesn’t matter
if you’re shooting friends over for a dinner party or a paid
architecture gig, the small details matter! Look at the counter tops
for pens and notepaper, do they belong in the shot or can they be
stashed somewhere else? The toilet seat cover being down probably looks
more attractive, and taking the time to even out towels on a rack will
provide a better photo. If there are dirty dishes in a sink, clean and
put them away. Full ashtrays look gross and crooked picture frames can
make properly composed photographs look crooked. Take the time to stage
your photograph, these are things that can’t be easily edited in post
production.
Bounce the Flash. If you must use a flash inside, use a
hotshoe mounted flash, not the pop-up on-camera one. I’d also strongly
suggest a flash bracket to get the flash further away from the lens and
reduce red-eye.
Bounce the flash off a wall, ceiling or, if none are available, utilize
an Omni-Bounce or similar diffuser. When you bounce or diffuse a
flash, be aware that you essentially lose some of the effective power of
it. You’ll need to utilize either exposure compensation on your camera
or adjust the ISO slightly higher to compensate for the difference.
Flash photography indoors should only be utilized when you can’t achieve
the desired look from natural light.

Windows, Picture Frames, Mirrors and Glass Cabinets. Perhaps
one of the most frustrating things to deal with while shooting indoor
photography are reflective materials, especially when shooting with a
flash. Avoid using your flash if there is glass or reflective materials
in the room at all. Pack a circular polarizer filter to deal with the
reflective and glass objects in your shots, and be aware you could lose
1/2 to 2 full stops of light, so adjust accordingly either via opening
up the aperture or bumping the ISO higher.
Also take note to whether or
not you show up in the reflection of any shiny objects!
A Tripod is Your Friend! While I know it’s nearly
impossible to shoot candid photos of people with a tripod, if you’re
doing architectural shots or photos of non-moving subject matter
indoors, utilize a tripod. Not only will it allow you to utilize the
lowest possible ISO for the least amount of digital noise, it will
provide a solid platform for you to properly align and compose your
photograph.
As mentioned, indoor photography is a bit tricky and a
lot of people can give up on it quickly. I strongly suggest that you
continue to experiment and take several shots of everything, also known
as bracket shooting. This will give you a better idea of what is and
isn’t working for you. One tip worth mentioning that is often
overlooked is knowing the time of day and current weather outside, and
how that relates to the house or building you’re shooting in. For
example, shooting in an eastern facing kitchen at 9am is going to
provide some pretty bright light through the windows on a cloud free
day. The same kitchen at 4pm will probably be much darker since the sun
will be passing over the house to the other side and shadows will be
far less harsh.

Indoor photography is perhaps one of the most challenging places to shoot for new and experienced photographers. Natural and artificial light combined with natural light reflecting and refracting through windows and off walls can lead to some funky photographs. Mastering indoor photography can be one of the most frustrating things to learn. These seven deadly sins of indoor photography should be avoided, doing so will result in far better photographs.
Lack of Custom White Balance. I’ve already shown you how and why you need to manually set your white balance, why not take the time to do it? Because almost all indoor photography has some sort of mixed lighting situation, it’s almost positive that auto or one the presets available on your camera won’t give you great results.
On Camera Flash. Utilizing the on camera flash for indoor photography will surely give you a washed out, unflattering photograph. Avoid it at all costs if you can, even if you need to raise the ISO, avoid on camera flash whenever possible.

a very slow shutter speed and a high ISO. The model has to keep very
still OR even a little blur is ok. It makes it more artistic. Again,
remember there is no right or wrong UNLESS the client doesn’t like it.
In this case my client, Deliverance Poker did like it.
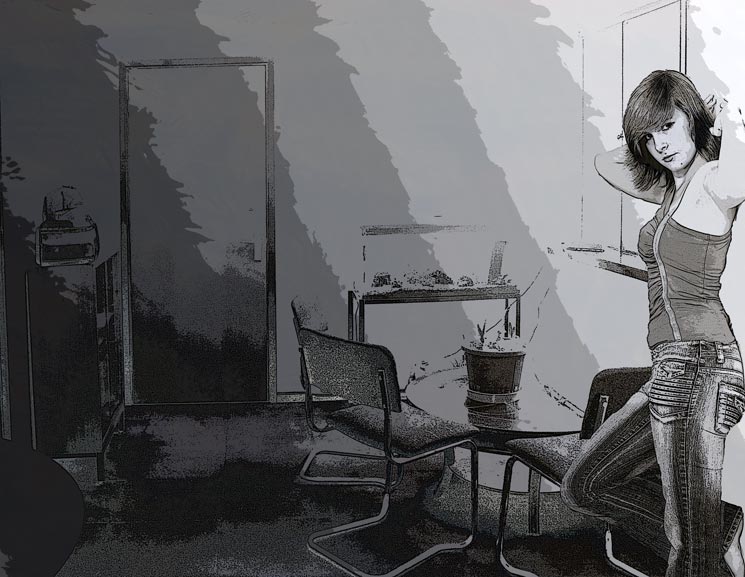
Now I also wanted to try something else so I made the image black and
white in Lightroom. I also cropped it much tighter. I like both
versions. I just want to show you how you don’t ALWAYS have to use
additional lighting to capture a great shot.
This is the black and white cropped version.


No comments:
Post a Comment